HomeArize
Avoid costly flooring estimate mistakes with expert tips, a practical estimating checklist, and proven strategies to create accurate quotes and improve profitability.
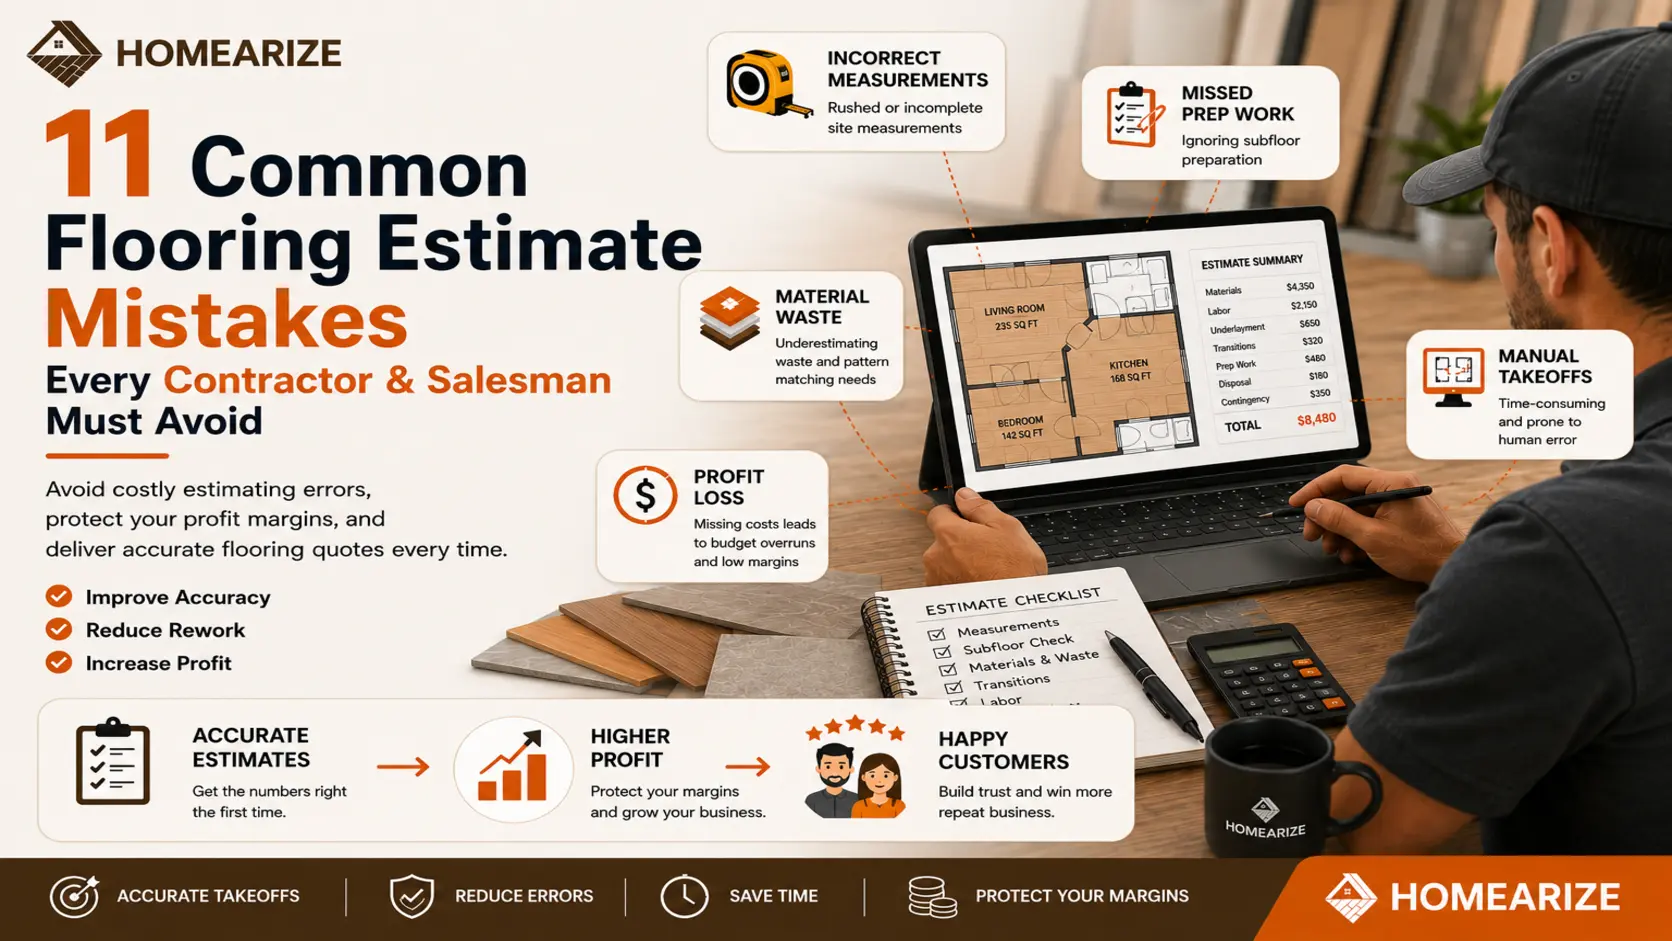
11 Common Flooring Estimate Mistakes Every Contractor And Salesman Must Avoid
Accurate estimating separates profitable contractors and salesmen from those who struggle to keep projects on budget. A clear, data-driven flooring estimate sets expectations with homeowners, protects margins, and reduces the risk of costly disputes mid-project.
Even experienced teams make avoidable errors - rushed measurements, missed prep work, or omitted line items - that quietly erode profit. This article breaks down the most frequent estimating pitfalls, explains why they happen, shows the impact on a typical project, and gives practical steps to avoid them.
Throughout the guide you'll find practical examples for contractors and salesmen, along with a reusable flooring estimating checklist to reduce common errors. If you want to streamline estimates, tools like HomeArize illustrate how flooring estimating software and digital takeoffs can remove manual guesswork and keep bids consistent across projects.
The High Cost of Inaccurate Flooring Estimates
A single missing line item or an undercounted room can create a chain reaction: materials run short, crews idle while supplies arrive, and change orders frustrate clients. Even modest mistakes on material or labor can cut into margins and damage your reputation - two outcomes that are far more expensive than taking a few extra minutes to verify measurements and scope.
For contractors and salesmen, the solution is straightforward: treat every estimate as a small project. Document assumptions, call out contingencies, and make the estimate auditable so you can explain costs clearly if questions arise.
1) Rushed or Incomplete Site Measurements
Precision during the initial walkthrough is your best defense against budget overruns. Whether you're a contractor measuring on-site or a salesman preparing the final quote, accurate measurements are essential. When estimators rush the site visit or skip areas, critical details like alcoves, closets, thresholds, and stair runs get missed, resulting in material shortages, rework, and reduced profit margins.
Why it happens: tight schedules, pressure to deliver quick area figures, or overreliance on plans instead of measuring the actual space. Impact on profit: even a small missed offset in a 200 sq ft kitchen can force last-minute orders, add labor hours, and cost hundreds in rush shipping and idle crew time.
How to avoid it (3-step checklist):
Measure every usable area wall-to-wall, including closets and door reveals; record both length/width and longest/shortest points.
Use a laser measure and photograph critical dimensions; calibrate your device per manufacturer recommendations and log the reading source.
Before finalizing material quantities, many contractors also use a Flooring Calculator to verify room measurements and estimate flooring requirements more accurately.
Document assumptions (waste %, pattern match, transitions) on-site and add a brief contingency line to the estimate.
2) Ignoring Subfloor Preparation
Assuming the existing substrate is "good enough" is one of the fastest ways to lose profit. Skipping a proper subfloor inspection forces crews to perform leveling, repairs, or moisture mitigation during installation - driving labor hours up and creating costly change orders.
Why it happens: tight bids, pressure to win jobs, or inexperience on the walkthrough can lead estimators to skip checks. Impact on profit: unplanned remediation can add labor and materials that easily exceed the original margin on a project, and for sensitive installs - like hardwood flooring or solid hardwood - moisture or unevenness can cause failures that result in callbacks and warranty claims.
Contractor example: on a mid-size remodel, a 12-hour subfloor leveling and additional underlayment added a day of labor and $600 in materials - turning a thin projected profit into break-even territory.
On-site subfloor checklist (quick):
Moisture test results (use a reliable moisture meter; follow manufacturer limits for each material type).
3-point level checks across the room and along long runs to find high/low spots.
Inspect for loose boards, squeaks, rot, or surface contamination (adhesive residue, paint).
Check fasteners and nail/screw pattern - identify areas needing refasten or repair.
Confirm required underlayment and moisture barrier per the manufacturer for the chosen finish.
Practical tip: note all findings on your estimate (attach photos), include a line item for “subfloor remediation” with a realistic range, and flag installs requiring full moisture mitigation - this preserves margins and prevents disputes.
3) Underestimating Waste and Pattern-Matching Needs
Counting only the raw square footage is a common estimating mistake - materials need extra allowance for cuts, seams, and pattern repeats. Failing to apply the proper waste factor or to account for pattern matching leads to mid-project shortages, rush orders, and lost profit.
Why it happens: estimators default to a single percent for every job, skip checking the product repeat, or underestimate complexity on diagonal or herringbone layouts. Impact on profit: on a 500 sq ft project, under-allocating waste by 5% can mean an unexpected order and expedited shipping costs that exceed the original margin.
Material-specific guidance (typical industry ranges):
Laminate / laminate flooring: usually 5–8% for straight runs; add more for trim or stair treads.
Tile / stone: 10–15% for field tile; 15%+ for intricate patterns, diagonal layouts, or mosaics.
Hardwood: plan 7–12% depending on board width, pattern (e.g., herringbone), and plank grading.
How to avoid it (quick method): use your takeoff tool or a simple spreadsheet formula: required = measured area × (1 + waste%). Verify pattern repeat and orientation with the supplier before finalizing the order. For jobs with pattern matching, increase the waste factor conservatively and buy from the same dye lot to avoid color variance.
Pro tip: include a “material contingency” line on the estimate and note that final material quantities are confirmed once product and layout are chosen - this keeps the client informed and protects your margin.
4) Forgetting Transitions, Thresholds, and Accessories
Small components like transition strips, reducers, and thresholds may feel insignificant during the bid, but they add up - and leaving them out creates delays, reorders, and unhappy homeowners. These pieces are critical for a finished look and often require specific sizes or adhesives depending on the chosen material.
Why it happens: estimators focus on large line items (materials and labor) and assume transitions are included or will be handled on-site. Impact on profit: multiple omitted transitions across a multi-room job can add unplanned parts costs, extra trips, and a day or more in lost production.
Contractor example: on a three-bedroom remodel, omitting transitions for each doorway required a next-day supplier run and a $250 rush charge plus two hours of crew downtime - turning a small expected profit into a much smaller margin.
How to avoid it (quick checklist):
Count every doorway, change in floor height, and method of termination (tile to carpet, wood to vinyl).
Specify the transition type for each junction (T-molding, reducer, threshold, end cap) and note the finish/color to avoid mismatches.
Include adhesives, fasteners, or specialized clips as separate line items tied to the transition lengths.
Take photos of existing thresholds and attach them to the estimate so the client understands the scope.
Material note: some finishes, like vinyl, may require specific transition profiles or adhesives - confirm manufacturer recommendations during the estimate to avoid callbacks and warranty issues.
5) Miscalculating Irregular Room Geometry
Rooms with alcoves, bay windows, curved walls, or multi-angle footprints are a common source of error. Treating every space as a simple rectangle undercounts the true square footage, leads to extra cuts, and increases scrap - so your final material amount will fall short and your crew will lose productive time.
Why it happens: busy walkthroughs, overreliance on old plans, or assuming symmetry where none exists. Impact on profit: underestimated size and complexity can force rush orders, add installation labor for complex cutting, and reduce the job’s margin.
Step-by-step method to avoid the mistake:
Break the space into smaller rectangles or triangles on-site. Measure each segment and record its area; then sum the parts to get the true square footage.
Measure longest and shortest dimensions, door reveals, and any vertical surfaces (stairs, risers) that require material; photograph unusual corners for documentation.
Apply an adjusted waste factor for irregular areas - increase by 3–5% over standard allowance depending on complexity - and confirm the final layout with the client before ordering materials.
Contractor example: a living room with a curved bay measured as 350 sq ft by rough estimation but totaled 385 sq ft when segmented - without the extra 10% waste for curves the crew needed an emergency order that cost both shipping and a half day of lost labor.
Tools and best practices: use a laser measure for accuracy, take detailed photos, and verify segmented totals in your estimating software or spreadsheet before placing the material order. This small effort saves time and protects your profit on every project.
6) Miscalculating Labor and Installation Complexity
Labor is usually the single largest variable on a flooring project. Whether you're a contractor planning installation or a salesman preparing a customer quote, understanding labor requirements is essential for accurate pricing. Underestimating the time or skill required for a project, whether due to complex patterns, difficult subfloors, or multi-room sequencing, quickly erodes margins and leads to scheduling delays.
Why it happens: estimators reuse old labor figures, fail to account for crew skill level, or don't adjust for factors like adhesive cure time, stair work, or intricate layouts. Salesmen may also overlook installation complexity when preparing estimates, resulting in inaccurate quotes and unexpected project costs. Impact on profit: an underestimated labor line forces you to absorb overtime, pay for additional helpers, or accept a lower effective hourly rate for your crew.
How to avoid it:
Establish baseline labor units for common installs (sq ft per hour for straight-lay laminate vs. herringbone or tile with complex cuts). Track actual hours on early projects to refine those baselines.
Use skill-level multipliers: increase labor allowances for pattern work, stairs, or poor subfloor conditions (for example, add 25–50% time for herringbone or diagonal patterns as a planning guideline).
Include staged labor line items - demolition, prep, installation, finishing - so contingency or overtime is visible and billable if conditions change.
Contractor example: a two-person crew that typically installs 300 sq ft of plank flooring per day may only achieve 150–200 sq ft per day when installing a diagonal or engineered hardwood pattern; planning for that reduced productivity prevents margin loss and keeps the client informed.
Best practice: maintain a living table of actual labor hours by job type in your estimating system or spreadsheet, and update it quarterly. Training resources and manufacturer installation guides can help align your crew's productivity expectations with industry standards.
7) Ignoring Mobilization, Moving, and Disposal Costs
Logistics are not free. Skipping line items for furniture moving, protective floor coverings, debris hauling, or permit fees shifts those costs onto your crew and quickly chips away at profit. Including these items up front keeps estimates honest and protects your margin.
Why it happens: estimators focus on visible line items (materials, labor) and assume incidental tasks are implied or will be absorbed. Impact on profit: a single-day disposal or furniture-move can add hours of crew time, vehicle use, and disposal fees that exceed the job’s projected profit.
Common hidden line items to include:
Furniture moving and staging (flat per-room fee or hourly rate).
Protective coverings and site protection materials.
Old flooring removal and disposal (dump fees, bagging, haul-away labor).
Skilled labor for stair removals, baluster protection, or heavy appliance moves.
Permit or inspection fees if required by local jurisdiction.
Contractor example: on a two-day kitchen install, a last-minute furniture move and extra disposal run added three crew hours and a $120 dumpster fee - without those items in the estimate the job’s profit fell sharply.
How to avoid it: add standard mobilization and disposal line items to every estimate, or use per-room flat fees so clients see the cost up front. Photograph the site conditions during the walkthrough and note required services on the proposal to avoid surprises.
8) Inconsistent or Outdated Material Pricing
Using stale or inconsistent prices for materials leads to unpredictable bids and squeezed margins. Whether you're a contractor preparing a bid or a salesman creating a customer quote, using current material pricing is essential for maintaining profitability. Suppliers change costs frequently, and failing to reflect those changes in your estimates can turn an expected profit into a loss once invoices arrive.
Why it happens: estimators copy old line items, rely on memory instead of a price list, or lack a process for updating dealer quotes. Impact on profit: unexpected material price increases or incorrect unit pricing can reduce or eliminate your margin and make bids noncompetitive when corrected mid-contract.
How to avoid it:
Maintain a centralized price list for common materials and components; update it at least monthly or whenever suppliers publish new price lists.
Record unit costs with vendor name and last-update date in your estimating system so every material line is auditable.
Use price bands or contingency percentages for volatile items (plywood, specialty adhesives) instead of hard-fixed numbers when markets fluctuate.
Integrate supplier quotes or use CSV imports where possible to reduce manual entry errors and keep your estimates aligned with current costs.
Contractor example: a job quoted two weeks before a surge in plywood pricing left the contractor absorbing a 12% material increase; a simple monthly update procedure would have identified the change and preserved the intended margin.
Practical tip: add a “price validity” note on proposals (e.g., prices valid for 30 days) and include a small contingency line for material cost fluctuations - this keeps clients informed and prevents unexpected losses.
9) Omitting Underlayment, Moisture Barriers and Prep Items
Skipping essential prep items - underlayment, vapor or moisture barriers, and proper fasteners - is a common and costly estimating mistake. These components are often small line items in the proposal but are critical to long-term performance; omitting them from the flooring cost creates warranty risk and expensive callbacks.
Why it happens: estimators assume “standard” substrates or forget manufacturer requirements when quoting different types of flooring and finishes. Impact on profit: a failed install due to moisture can require full replacement or repair, easily costing multiples of the omitted line-item amount and damaging your reputation.
| Technical Oversight | Impact on Profit | Risk Level | Recommended Contingency Line |
|---|
| Furniture Removal | High | Moderate | $50–$150 per room (flat fee) |
| Debris Disposal | Medium | High | $100–$300 per project |
| Moisture Barriers / Vapor Retarders | Very High | Critical | Include manufacturer-specified barrier line + 5–10% contingency |
| Underlayment & Insulation | High | High | Per-sq-ft line item per material type |
Quick on-site checklist to include in every estimate:
Confirm substrate type and document moisture readings (attach photos and meter readings to the proposal).
Reference manufacturer installation instructions for the chosen material and list required underlayment or barrier by name.
Quote underlayment, moisture barrier, adhesives, and specialized fasteners as separate line items so clients understand the necessity and cost.
Add a small contingency for unknown substrate conditions when access is limited - note that final pricing may change after full inspection.
Contractor example: a homeowner-select engineered hardwood with no quoted moisture barrier. Mid-install, cupping appeared due to sub-slab moisture; the contractor covered the replacement cost. Including the proper vapor barrier at the estimate stage (and documenting the requirement) would have protected both the client and the contractor’s margin.
10) Relying on Manual Takeoffs
Manual takeoffs, whether performed by contractors or salesmen, introduce avoidable errors and slow the estimating process. Drawing areas by hand, using a scale ruler, or copying figures from previous bids increases the risk of inaccurate flooring estimates. When material quantities are under- or over-estimated, cash is tied up in excess stock or projects stall waiting for rush orders; both outcomes damage margins and client trust.
Why it happens: legacy habits, limited training on digital tools, or the false comfort of “this is how we’ve always done it.” Impact on profit: small rounding errors across multiple rooms can add up to hundreds of dollars per job, and recovering from an emergency order often costs more in lost productive time than the original savings from a manual approach.
How to transition (practical checklist):
Digitize plans and blueprints: capture PDFs or photos of drawings and import them into your estimating workflow so you can measure directly rather than rely on memory.
Use laser-measure data to validate on-screen square feet and perimeter values - record both the measured foot values and the final area used in the estimate for auditability.
Pilot a flooring estimating solution on two projects: compare the manual vs. automated estimates and track time saved and reorders avoided.
Train crews on the basic toolset (import, measure, verify) and require a quick peer review of takeoffs before ordering materials.
Example: a small contractor who shifted two-person takeoffs to a digital tool reduced reorders and adjustments; while exact savings vary by firm, many teams report faster turnaround and fewer mid-job material shortfalls after implementing digital takeoffs.
Note: Switching to
Flooring Estimating Software helps contractors and salesmen automate digital takeoffs, improve estimating accuracy, create consistent customer quotes, and reduce costly manual errors.
11) Failing to Adopt or Properly Integrate Estimating Software
Many contractors and salesmen know digital tools exist but delay adoption or implement them poorly. Choosing the wrong solution or failing to integrate it into everyday workflows leaves you with inconsistent bids and the same manual errors you tried to eliminate.
Why it happens: limited time for evaluation, fear of change, or buying tools that don’t match your business type or project complexity. Impact on profit: a mismatched system wastes training hours, creates duplicate effort, and delays estimating turnaround - costs that add up across multiple options and projects.
What to look for when selecting a solution (selection criteria):
Automated area detection and accurate visual takeoffs for irregular geometry.
Integration with your accounting and purchasing workflow to prevent pricing mismatches.
Cloud access and role-based permissions so field crews and office staff work from the same data.
Exportable reports and an audit trail to justify quantities and save change-order disputes.
Phased rollout plan (practical steps):
Pilot: pick two representative projects and test one software option for takeoffs and estimate generation.
Train: run short hands-on sessions for estimators and field leads, focusing on importing plans, measuring, and exporting a bill of materials.
Standardize: create a company template for line items, waste factors, and contingencies so every estimate uses the same logic and reduces variance.
Scale: once validated, roll the tool out to all estimators and add supplier price integrations to keep choice and pricing consistent.
Contractor example: a medium-size remodel firm piloted a takeoff tool on two jobs, found mismatched waste assumptions, corrected their templates, and then reduced material short orders and estimate revisions in subsequent projects.
Final note: evaluate solutions by feature fit, not brand buzz. A complete
Flooring Business Management Software solution combines estimating, CRM, scheduling, inventory, purchasing, and project management to help contractors streamline their entire workflow.
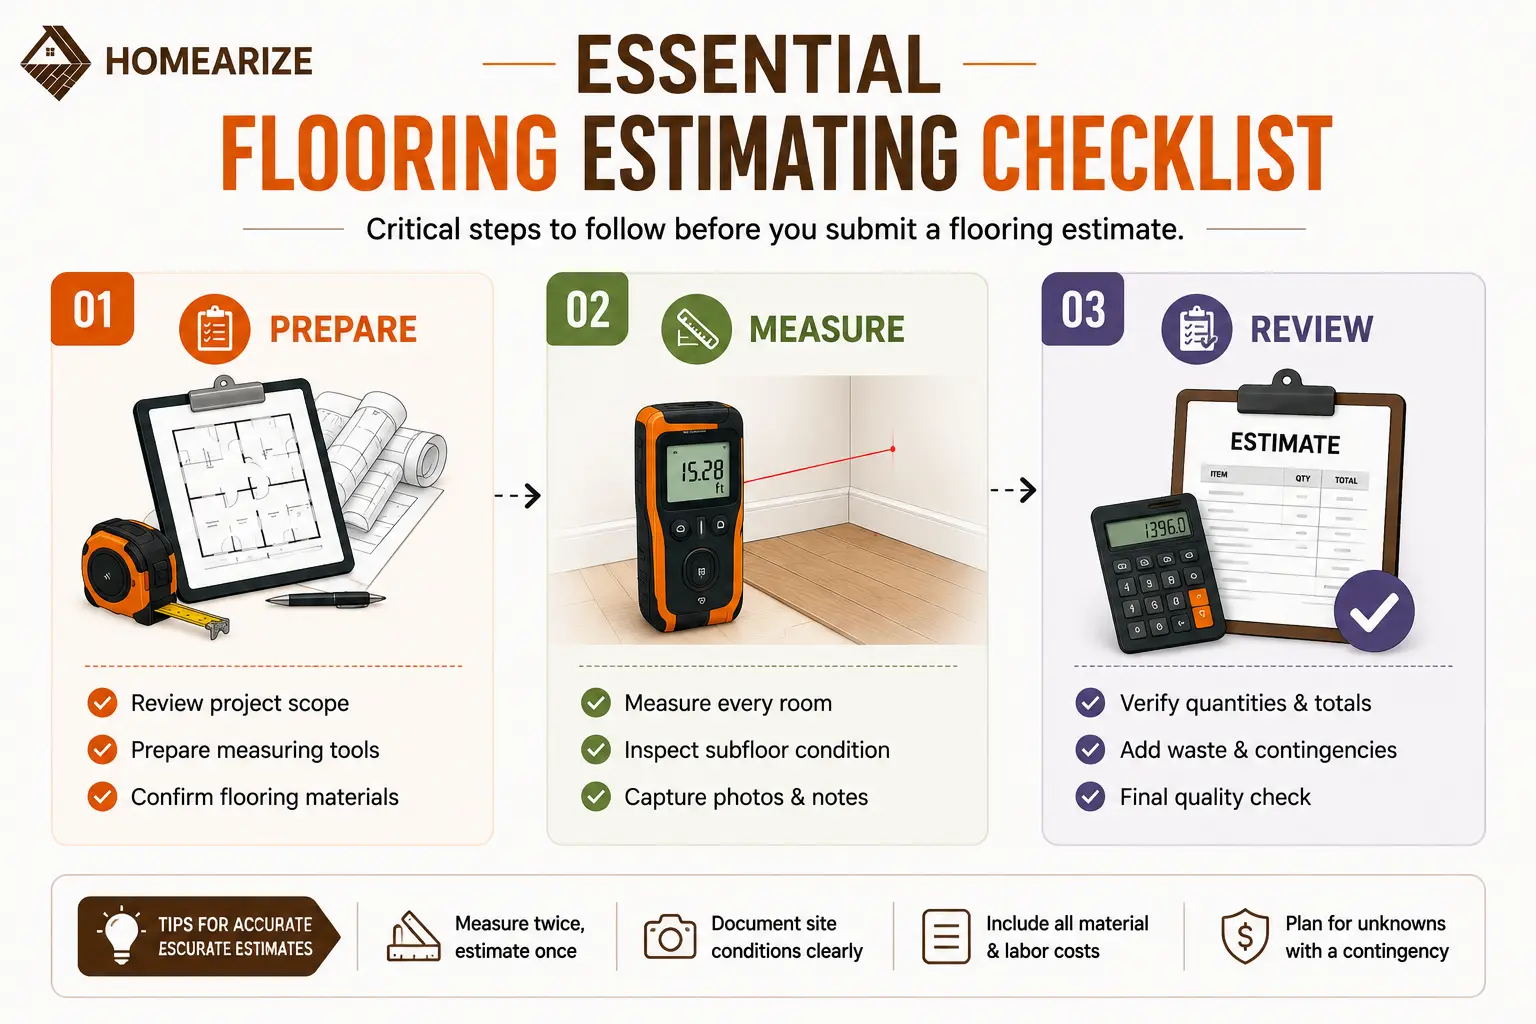
Essential Flooring Estimating Checklist for Contractors
Accurate bids start with a reliable flooring estimating checklist. Standardizing your process ensures every job captures the real scope, protects your cost expectations, and delivers consistent value to homeowners and project teams.
Pre-Site Visit Preparation Steps
Before you step on site, assemble the documentation and tools that make a walkthrough efficient and repeatable. Reviewing plans in advance and preparing a template reduces missed items and speeds up the estimate process.
Confirm project scope and material choices ahead of the visit so you measure the correct areas and finishes.
Pull blueprints or take digital photos of plans; import them into your workflow when possible to save time on takeoff.
Charge and check tools: laser measure, tablet/phone, camera, and pen-and-paper backup.
On-Site Measurement Best Practices
On-site measurements are where most estimating accuracy is won or lost. Capture definitive numbers and document site conditions that affect labor and material costs.
Measure each usable space wall-to-wall and record both the longest/shortest dimensions; note closet and alcove areas separately.
Document subfloor condition, thresholds, transitions, stair runs and any vertical surfaces that require material.
Take clear photos of tricky spots and label them in your estimate so clients see the basis for your numbers.
Record moisture readings and reference manufacturer requirements for the selected product-attach meter readings to the proposal.
Final Review and Contingency Planning
Before you deliver the proposal, perform a short quality check. A final review prevents simple arithmetic and omission errors and protects your margin from unforeseen site realities.
Reconcile totals: confirm summed room square footage equals the overall job area and that waste factors were applied consistently.
Include explicit line items for underlayment, moisture barriers, transitions, adhesives, and disposal so clients see where costs come from.
Add a contingency line (percentage or fixed range) for unknowns-note this is adjustable after full access to the site or product selection.
| Phase | Key Action | Goal |
|---|
| Preparation | Review blueprints & pre-select materials | Confirm scope and likely cost range |
| Measurement | Capture wall-to-wall square footage & site conditions | Ensure quantity accuracy for materials and labor |
| Review | Apply waste, contingencies, and QA check | Protect profit and reduce change orders |
Comparison of Manual vs. Automated Estimating Methods
Whether you're a contractor measuring projects or a salesman preparing estimates, choosing between manual and digital estimating methods directly affects speed, accuracy, and the consistency of your customer quotes. Manual workflows can work for small shops, but they scale poorly and are prone to repeated flooring measuring mistakes. Automated tools reduce human error and provide an auditable trail for every number in the proposal.
| Feature | Manual Estimation | Automated Software |
|---|
| Accuracy | Higher risk of human error | Precision-based calculations |
| Time Investment | Labor-intensive and slower | Faster, repeatable output |
| Data Storage | Paper files or local spreadsheets | Cloud-based, searchable |
| Error Prevention | Reactive troubleshooting | Proactive validation and audit trails |
For contractors and salesmen managing multiple projects, the ability to digitally visualize geometry, apply variable waste factors, and export an itemized bill of materials creates operational efficiency and reduces costly reorders. Whether you’re installing hardwood, tile, or resilient floors, the right process and tools protect your margins.
Conclusion
Consistent, well-documented flooring estimates help contractors and salesmen create accurate quotes, protect profit margins, and build long-term customer trust. Use the checklist above for every project and keep your pricing and templates updated so estimates reflect real-world costs. If you’re ready to reduce manual errors and speed up proposal turnaround, consider piloting flooring estimating software to standardize workflows and capture accurate square footage every time.
Ready to tighten your estimating process?
Try a demo of HomeArize or download our printable flooring estimating checklist to use on your next walkthrough—small, consistent changes protect profits and increase client satisfaction.
Reviewed by the HomeArize Editorial Team
This guide is based on flooring estimating best practices, contractor workflows, and practical project management experience to help flooring professionals improve estimating accuracy and profitability.
Highlights
- Accurate flooring estimates protect profit margins, reduce costly errors, and build customer trust.
- Digital estimating tools and standardized workflows improve accuracy, speed, and consistency.
- Following a proven estimating checklist helps contractors and salesmen to avoid rework and create more reliable flooring quotes.
FAQs
What are the most common flooring estimate errors that impact profitability?
The most common errors include inaccurate site measurements, failing to specify subfloor preparation, underestimating waste or pattern-matching, and omitting small but necessary items like transitions or moisture barriers. These mistakes lead to material shortages, added labor, and reduced margins.
How can flooring takeoff software improve the accuracy of my bids?
Flooring takeoff software automates area calculations, helps visualize complex geometry, and creates an auditable bill of materials. Integrated pricing and templates reduce manual entry errors and speed up estimate generation, which helps protect your margins and present clearer proposals to clients.
What items must be included in a professional estimating checklist?
A complete checklist includes measured square footage per room, waste factor, transitions, underlayment and moisture barriers, subfloor condition and moisture readings, moving and disposal fees, adhesive/fastener types, and contingency for unknown conditions.
How much waste should I include in a flooring estimate?
The waste factor depends on the flooring material and layout. Straight installations typically require less waste than diagonal, herringbone, or patterned layouts. Always follow the manufacturer's recommendations and account for room complexity.
What is the difference between a flooring estimate and a flooring takeoff?
A flooring takeoff calculates the quantities of materials required for a project, while a flooring estimate combines material costs, labor, waste, overhead, and other expenses to provide the customer with the total project price.
Tags:
Flooring EstimateFlooring Estimating SoftwareFlooring EstimatorFlooring Takeoff SoftwareFlooring Cost EstimateFlooring EstimatingFlooring Business ManagementFlooring ContractorsFlooring Measuring TipsFlooring Estimating Checklist